Hello World (using the Eclipse IDE)
Developing java programs from the command line can be less than efficient sometimes, depending on your level of expertise with command-line based tools like vim. Integrated Development Environments (i.e., IDE's) are an answer to that frustration. They pack everything a programmer might need (e.g., a good text editor with syntax highlighting, external library management, debugging tools to track down errors, etc...) into a single application with a nice graphical user interface for the rapid development of programs.
Eclipse is an IDE -- in fact, it's the IDE of choice for many professional java programmers. Follow the steps below to see how easy it is to create a simple program in this environment:
- Launch Eclipse
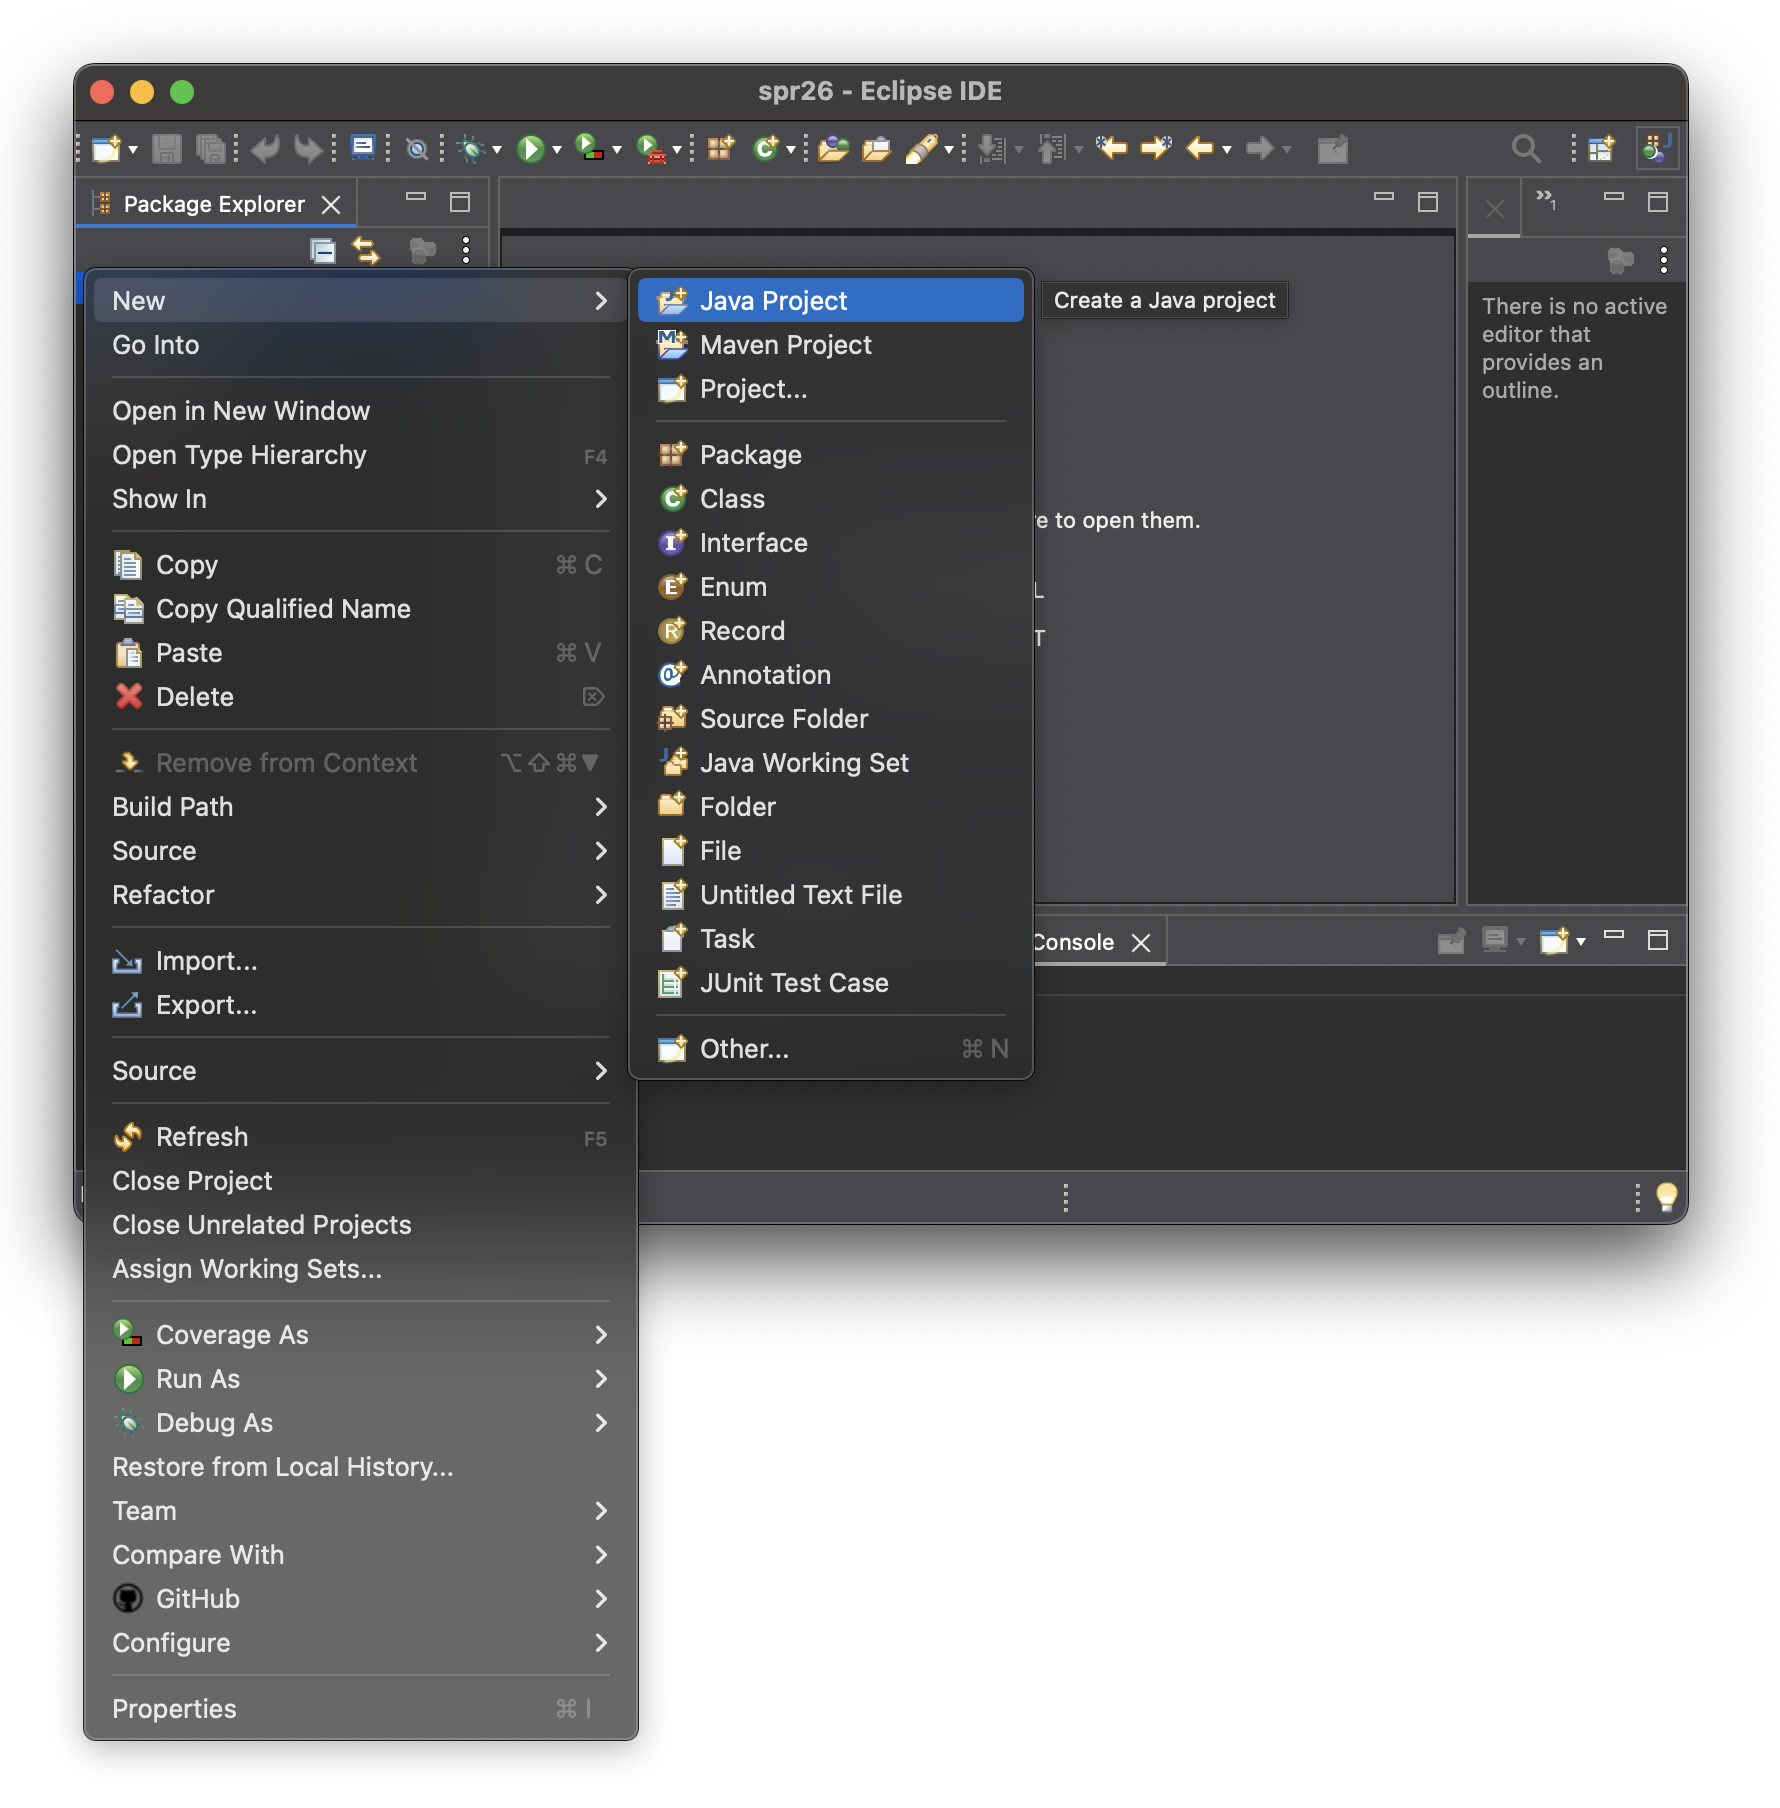
- Create a new Java Project by selecting either right-clicking in the area under the "Package Explorer" or clicking the File menu at the top of the application, and then selecting "New->Java Project" from the main menu
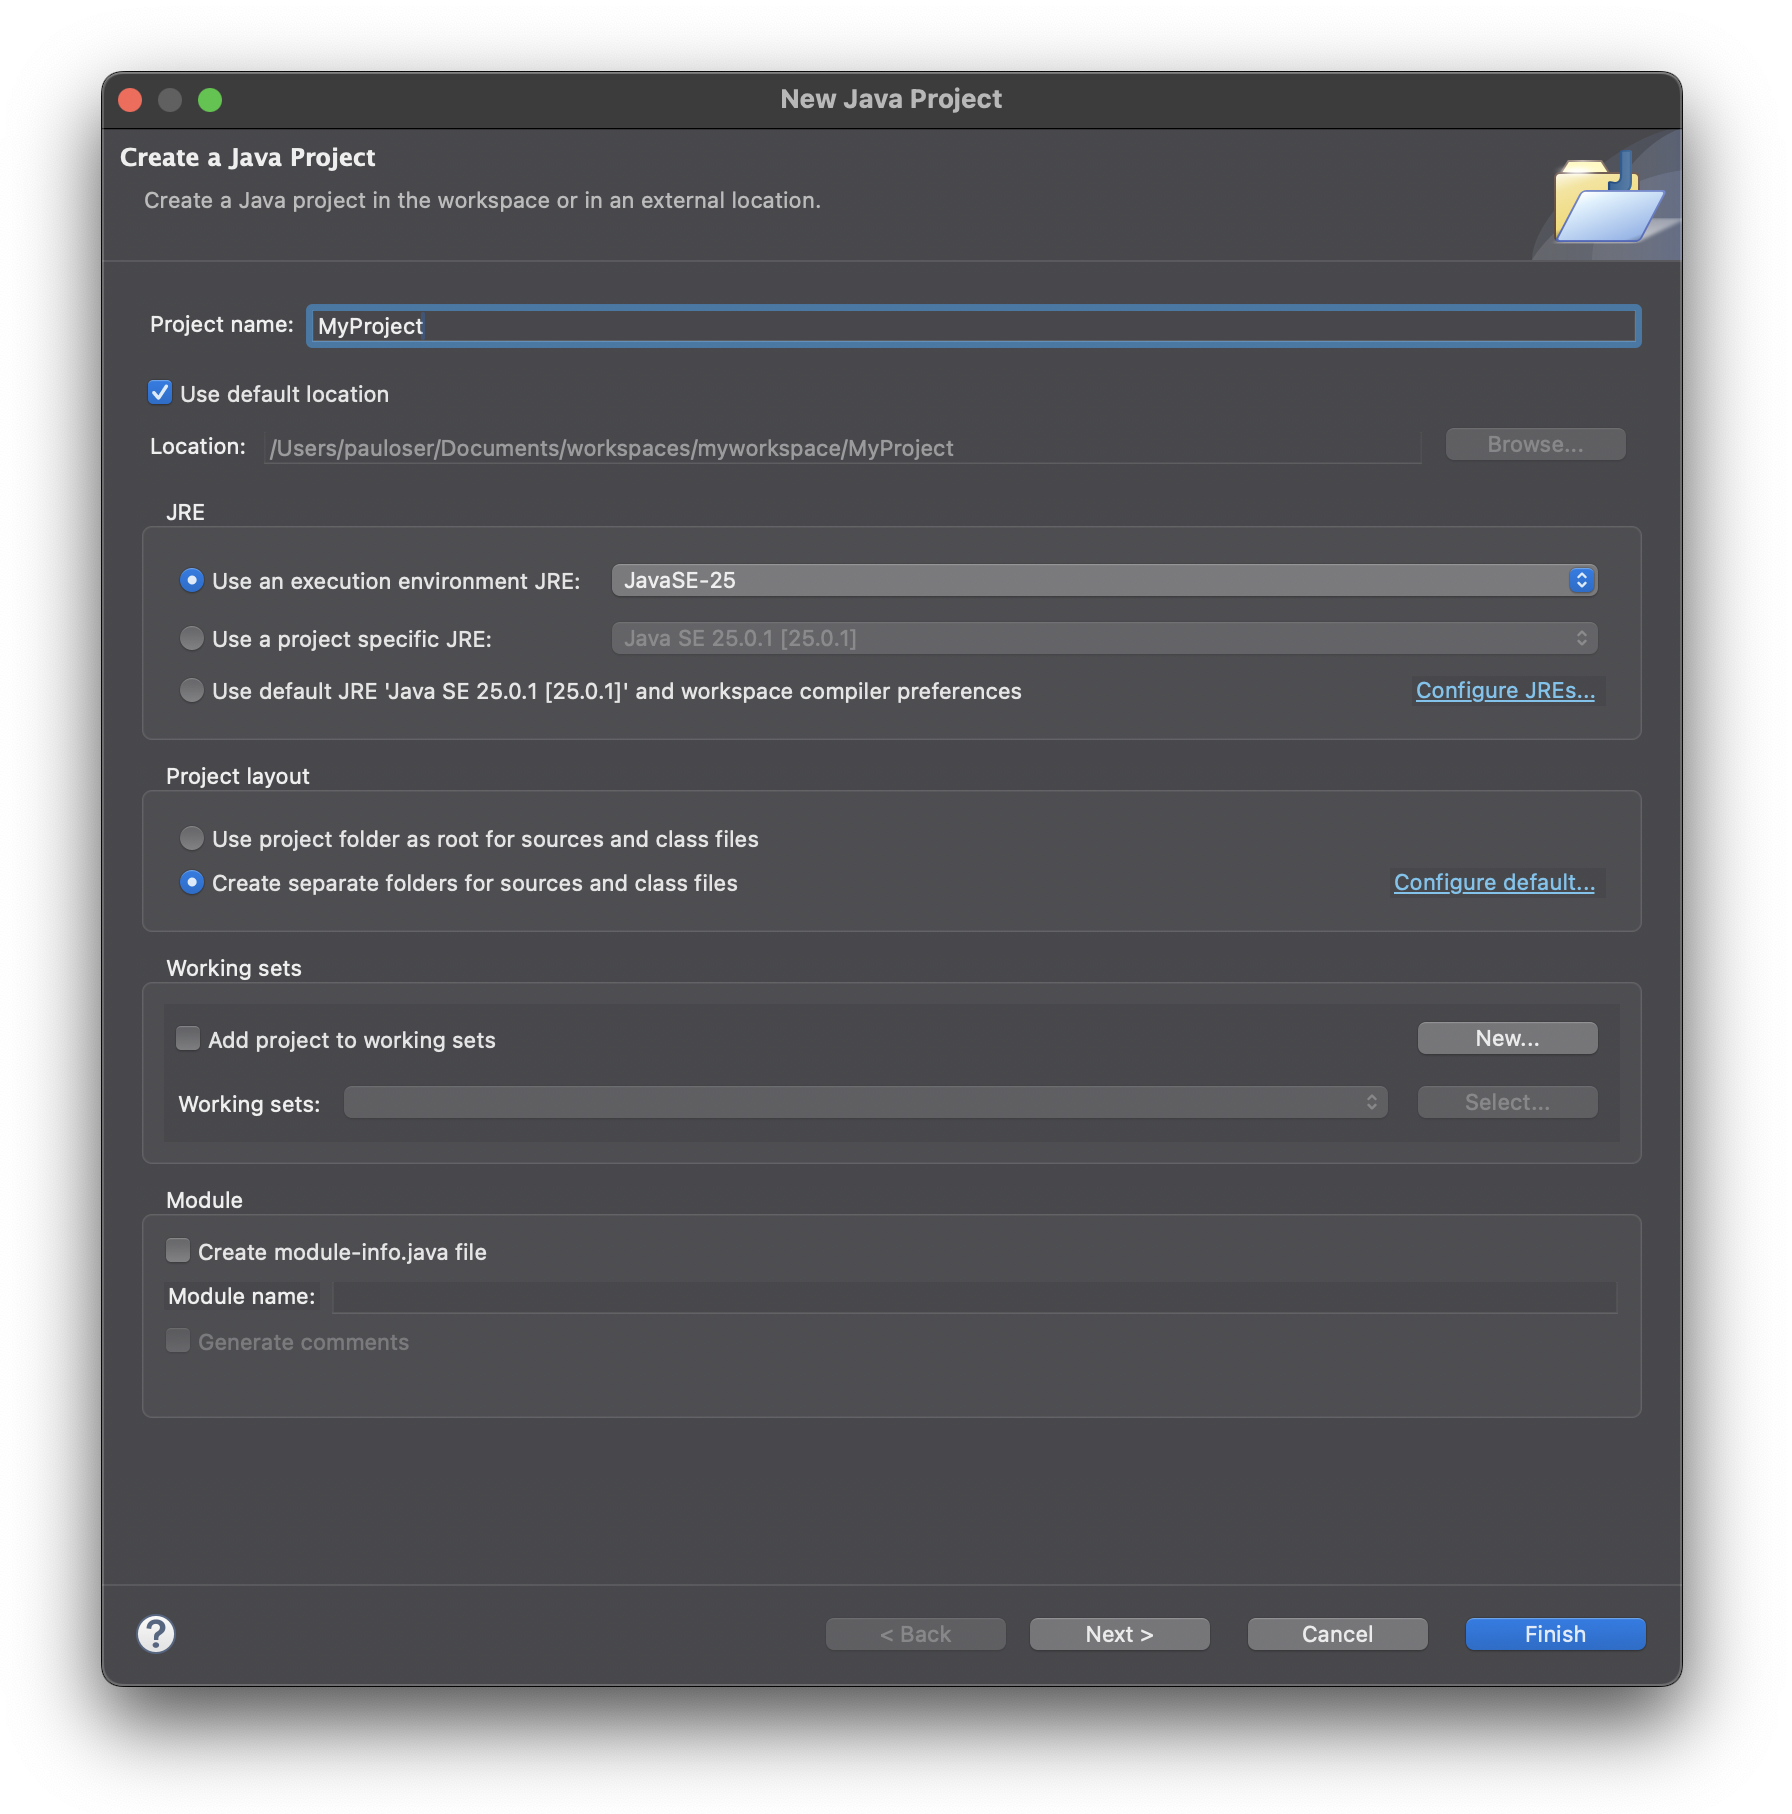
- We need to give our project an appropriate name. Let's use "MyProject". You will also want to make sure the checkbox that says "Create module-info.java file" is not checked. Then click "Finish".
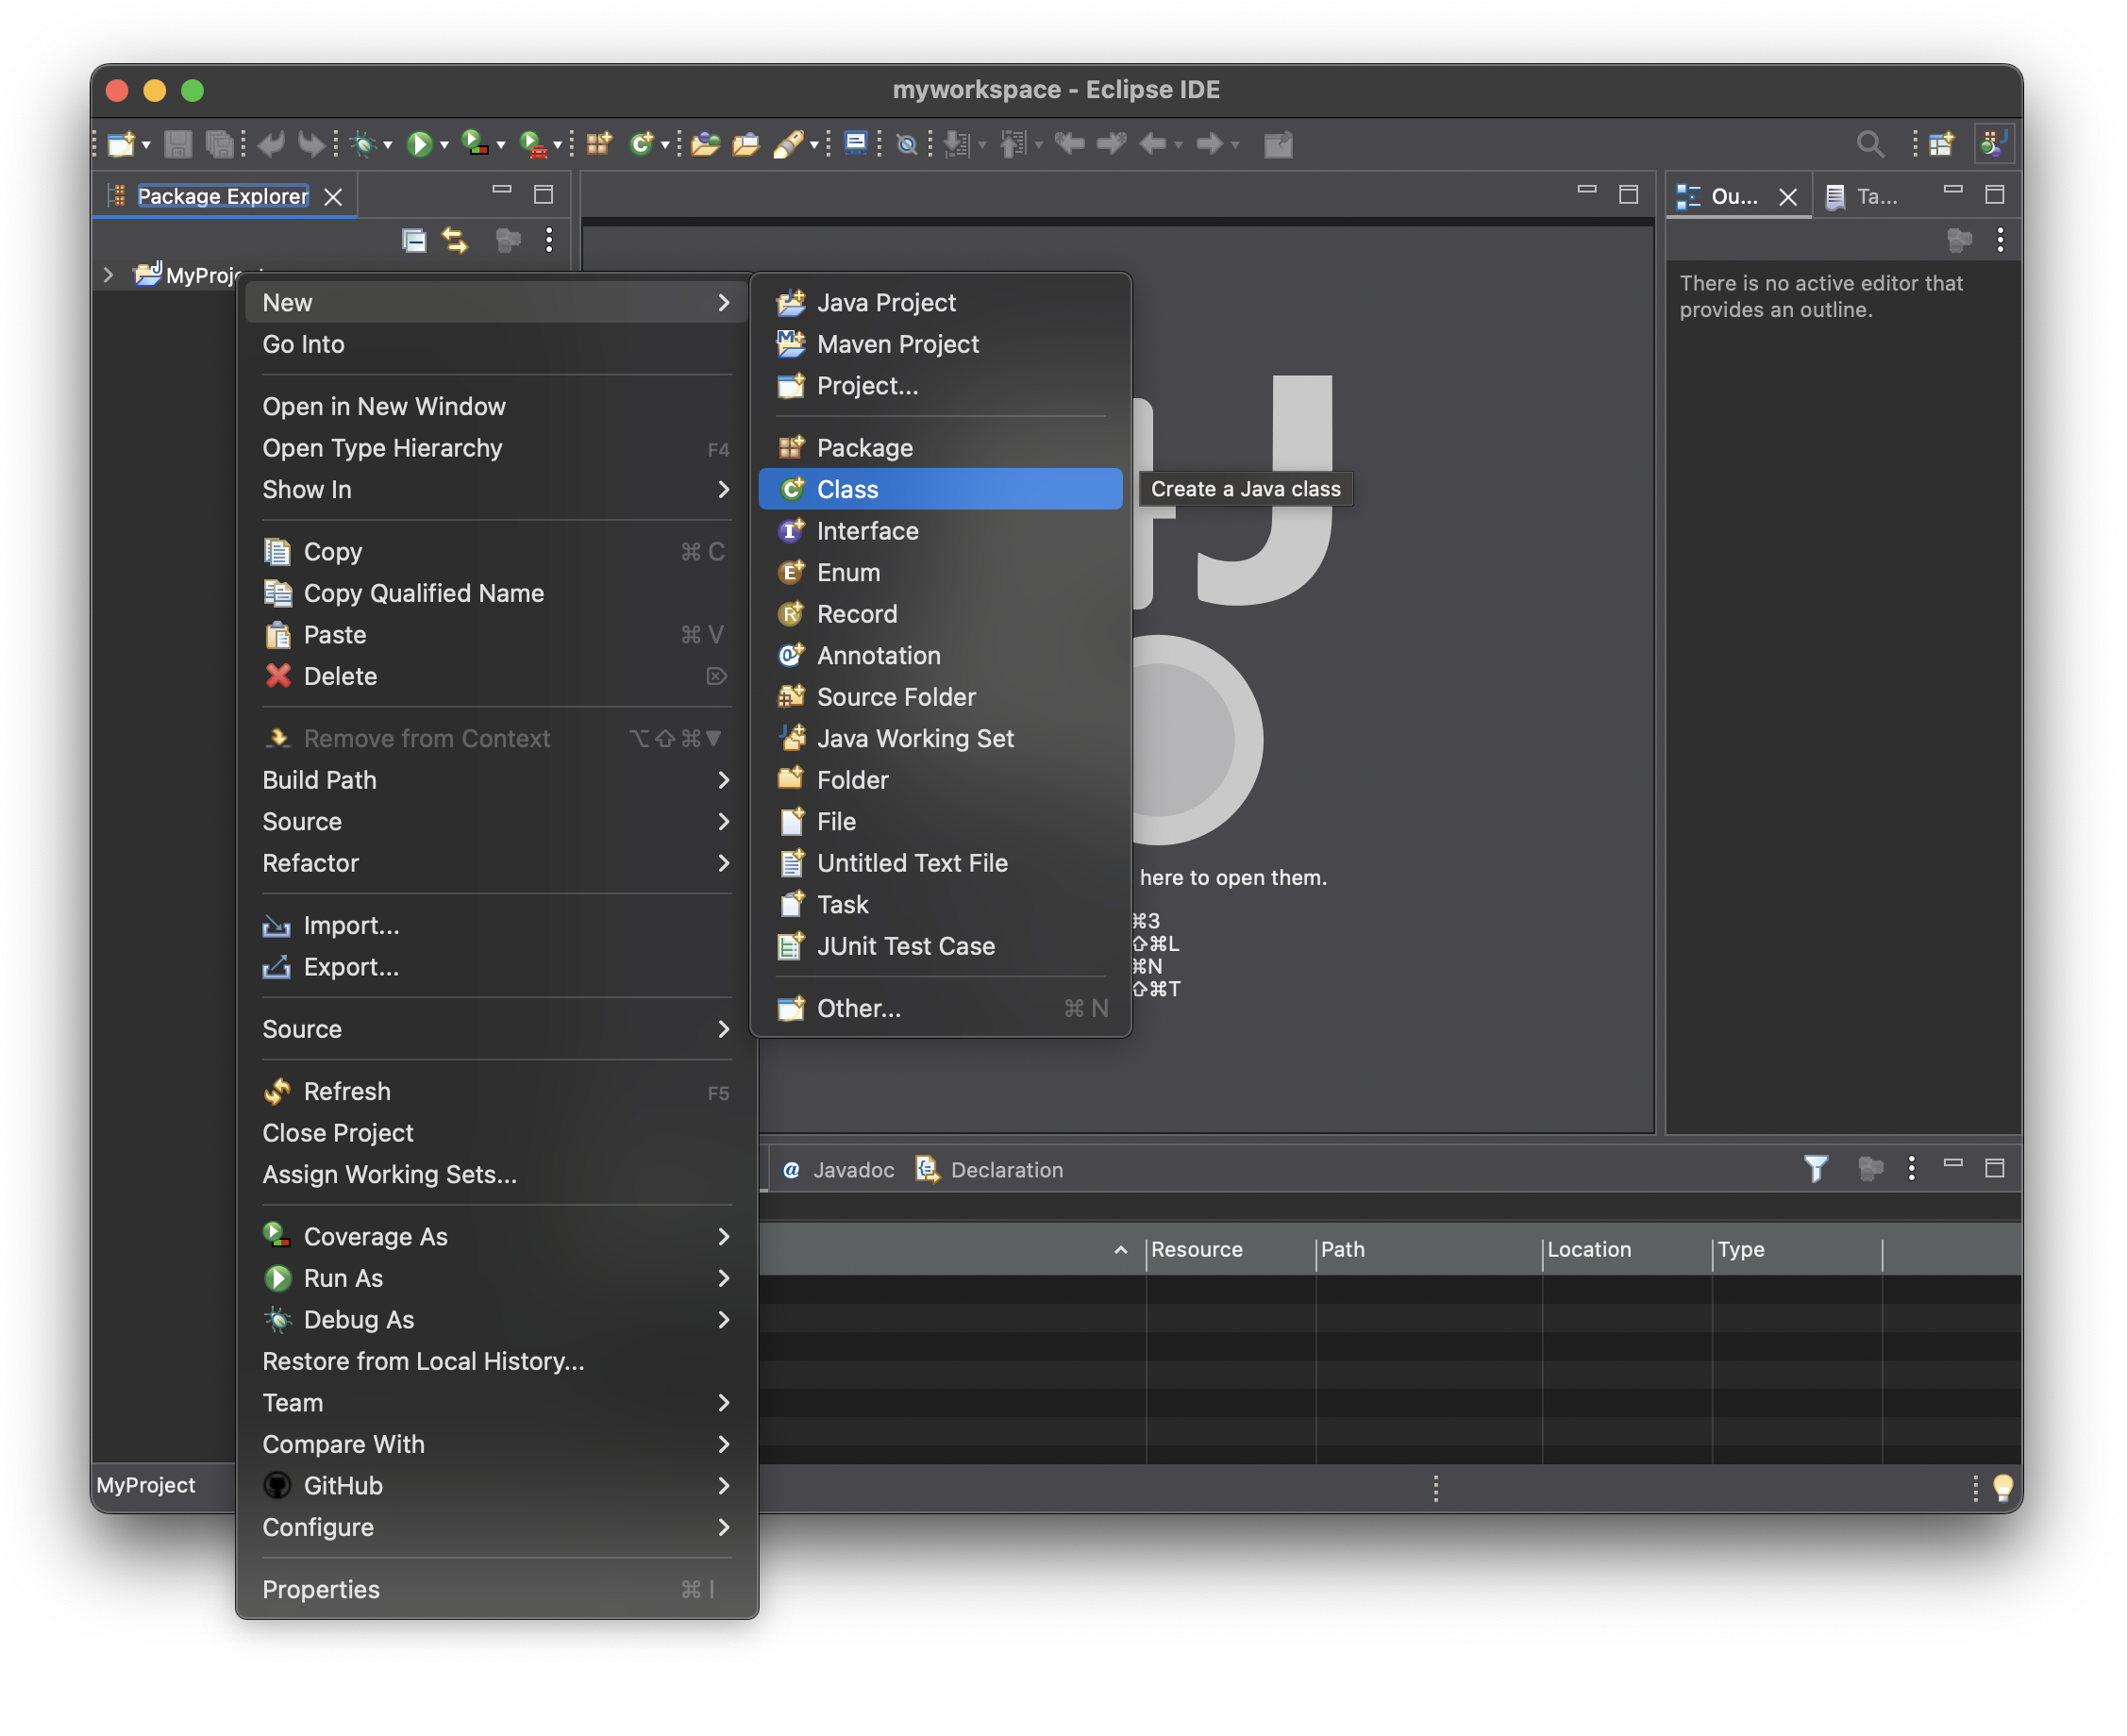
- If you expand the class with the right-facing arrow at its left, you will see a folder called "src". Right-click this folder icon and select "New->Class" from the pop-up menu. Each java program you write will consist of one or more of these classes.
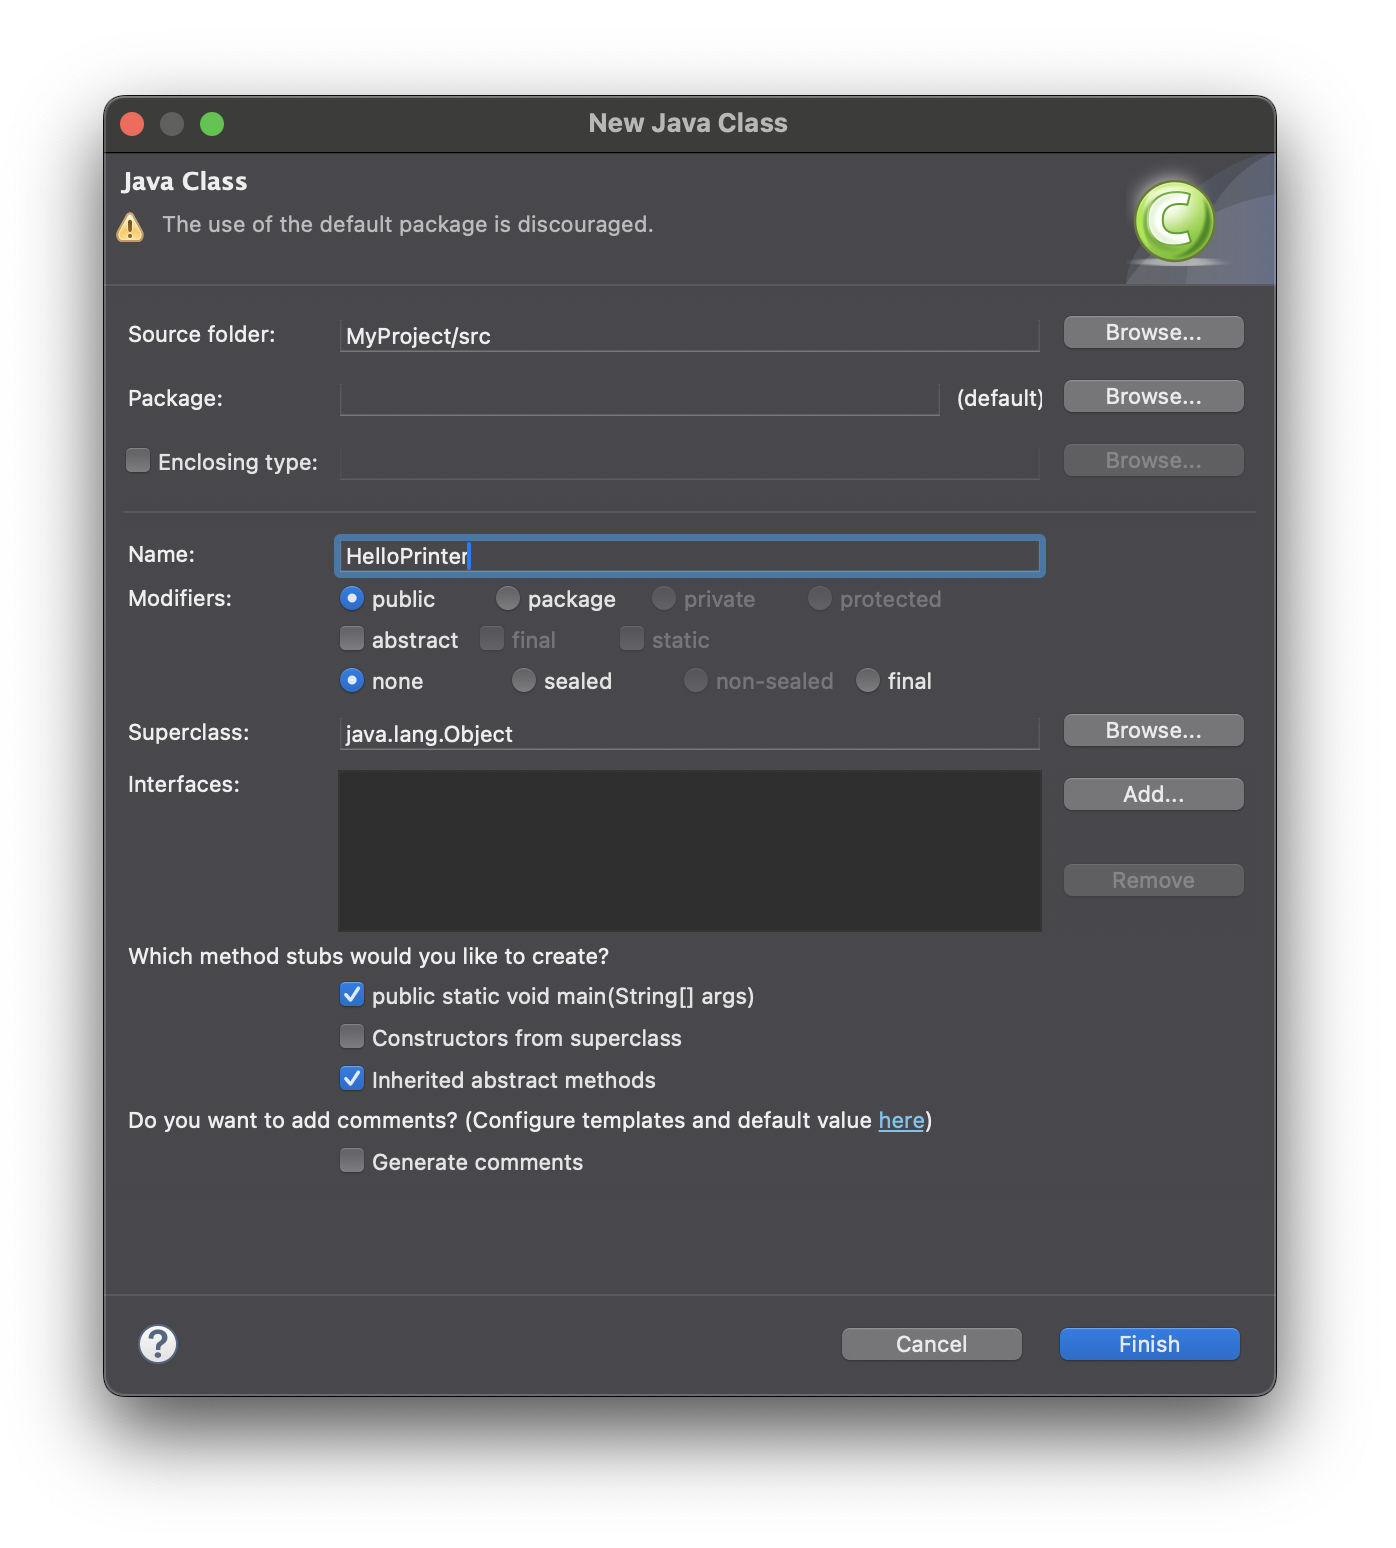
- You may see Eclipse warn you at the top of the dialog box that using the default package is discouraged. For now, we will disregard this warning -- we will learn more about packages and how to use them later. Let's name our new Java Class "HelloPrinter" (making sure to start your class name with a capital letter). Then, check the box under "Which method stubs would you like to create?" that says "public static void main(String[] args)". Click "Finish".
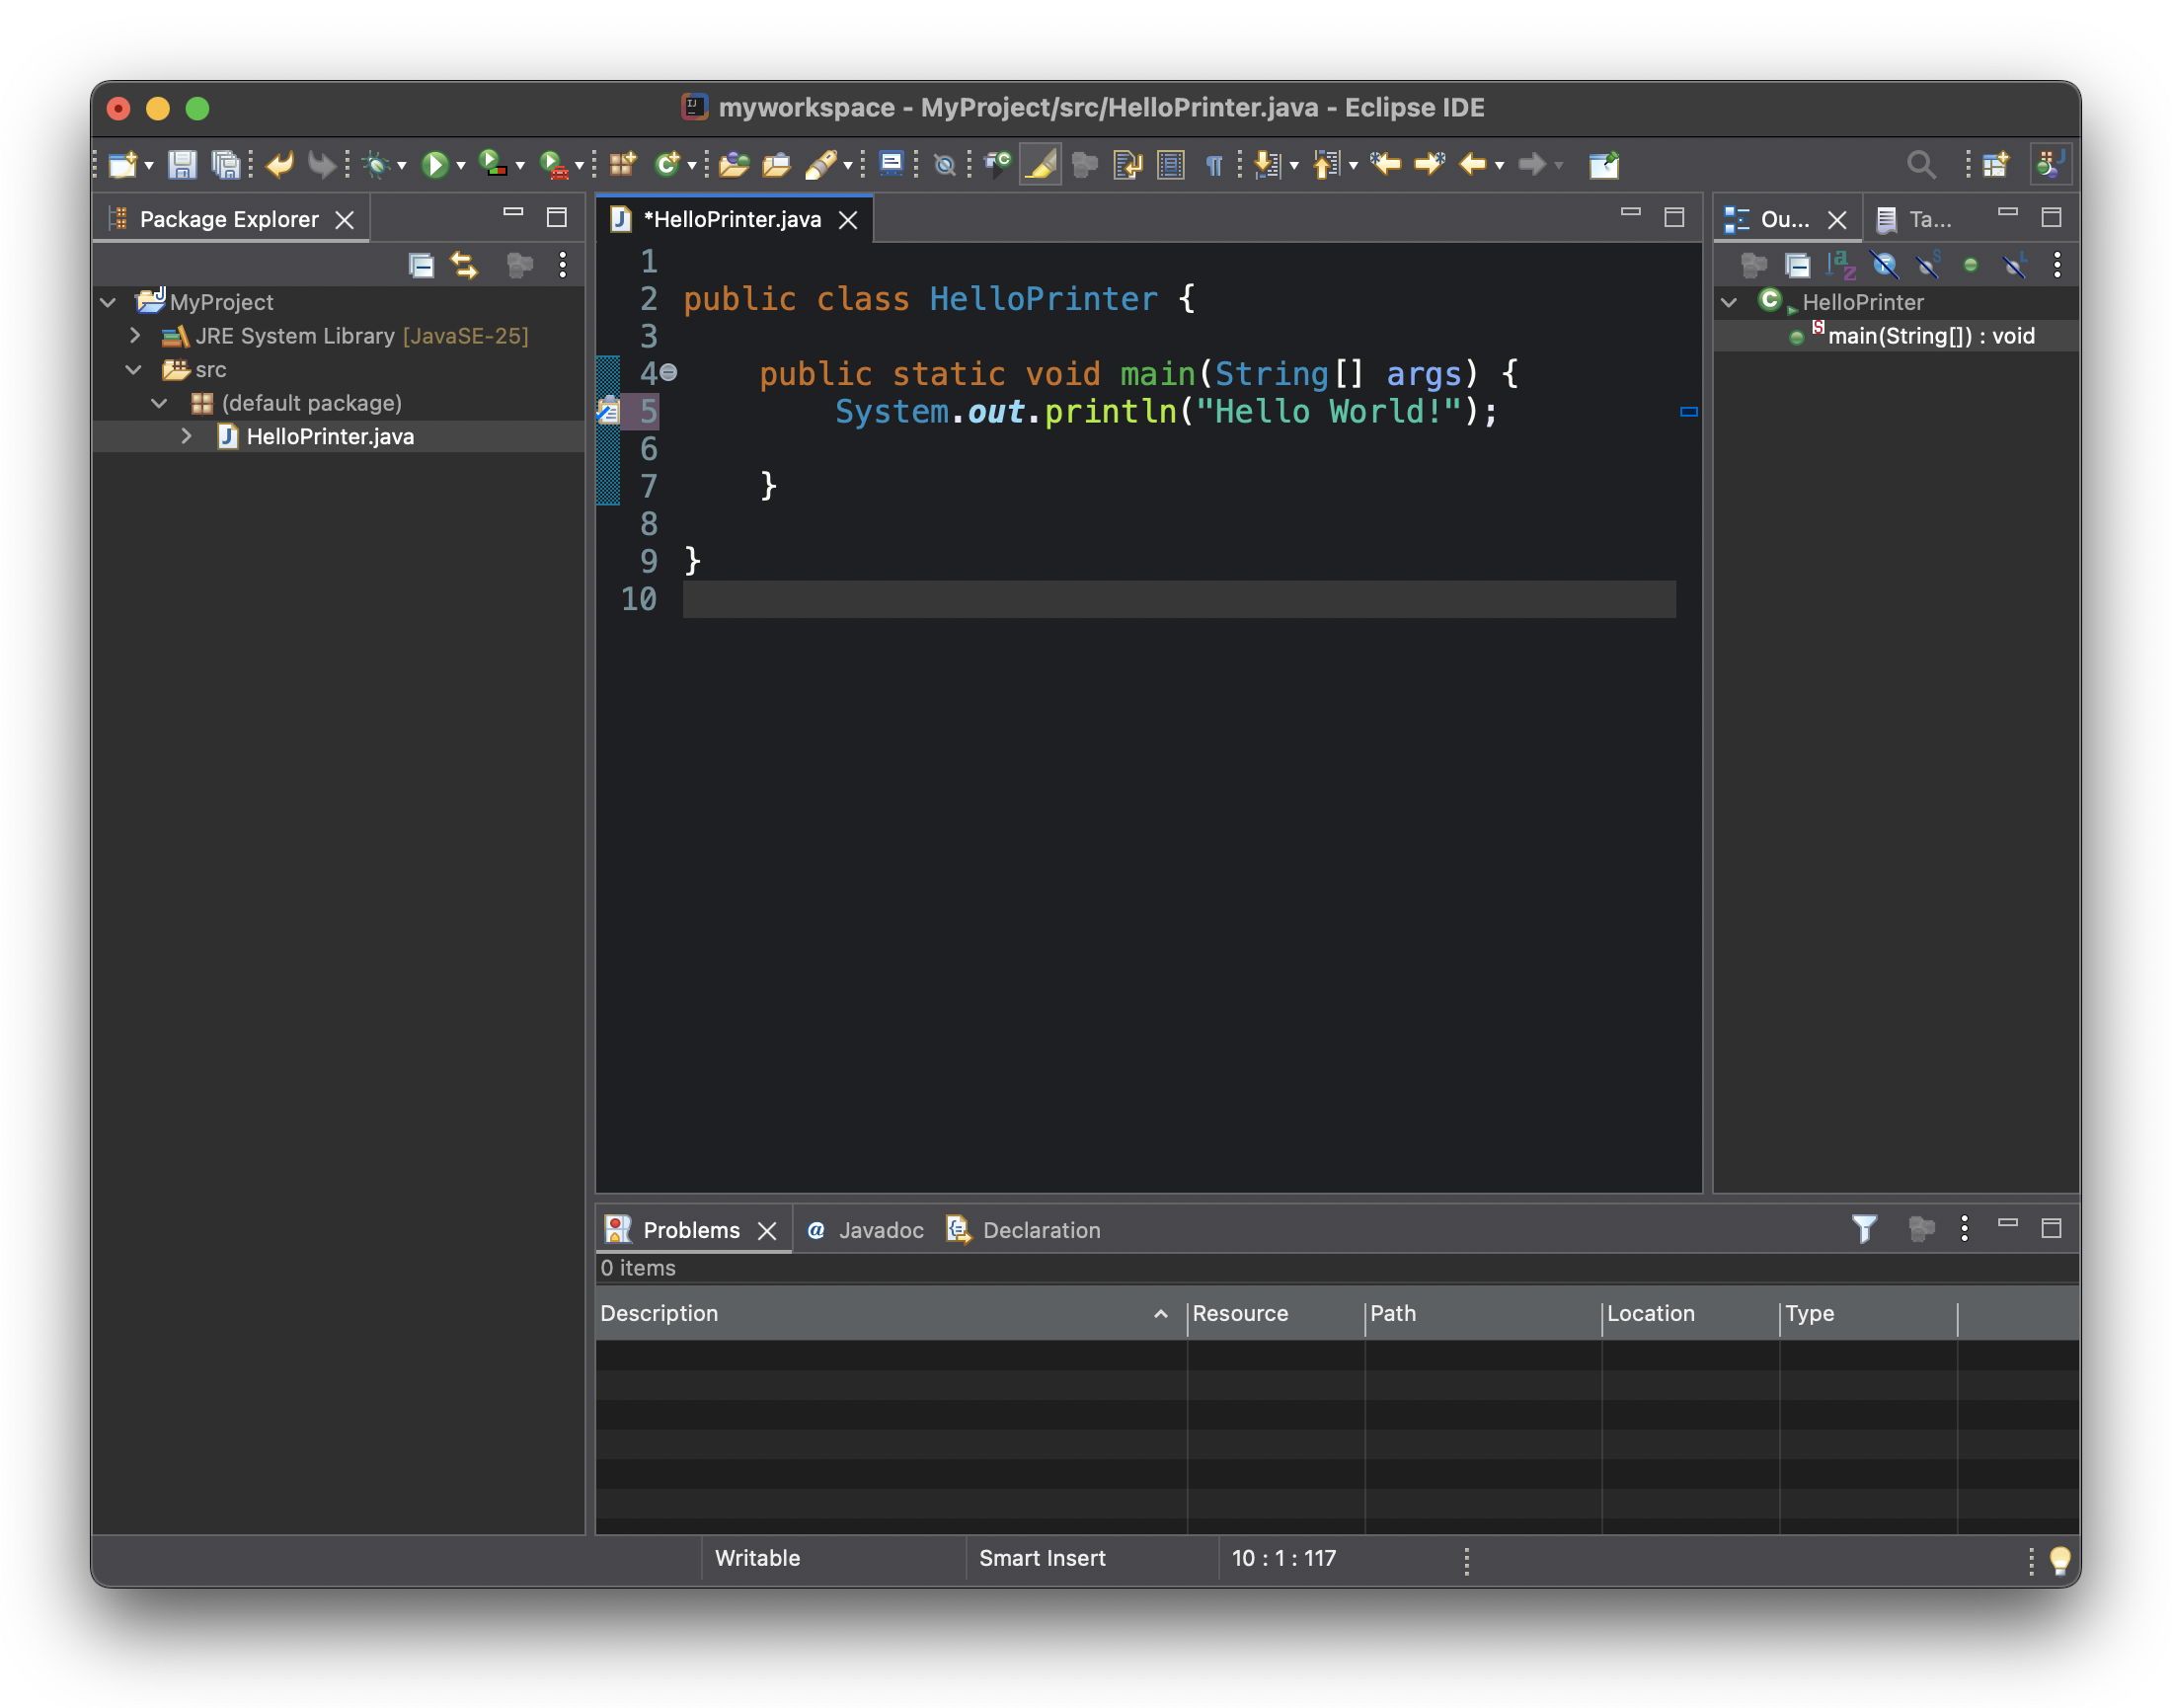
- Notice that Eclipse generates much of the code for you in the content area under the tab labeled "HelloPrinter.java". Finish writing the code for this program by replacing the comment
//TODO Auto-generated method stub
with the statement
System.out.println("Hello World!");
- Finally, run the program by clicking the large green "play" button. Notice the tabbed pane labeled "Console" at the bottom of the Eclipse window. This is where your output goes, unless you specify otherwise.

- Congratulations! You just wrote your first Java program in the Eclipse IDE!